Select external file during installation
The following article uses options that are available starting with the Enterprise edition and project type.
There are situations where you may need to allow the user to select an external file during installation, such as a configuration file or a license file.
In this article, we outline the steps required to implement this functionality in your setup package, allowing users to select an external file during the installation process.
1. Create project
After launching Advanced Installer, you will be presented with a dialog where you can choose the type of the project you want to create.

Select Enterprise and press the Create Project button. The new project has been created and from now on you will edit it.
![]() Save the project and give it an appropriate name - let's say "Select External
File" for this example.
Save the project and give it an appropriate name - let's say "Select External
File" for this example.
2. Enter product details
Now you can see the main view split into two panes. In the left pane, you can see all the options you have to edit in your current project, grouped in categories.
![]() Switch to “Product
Details” page to set the information seen by the user for your installation
package. Fill the fields in the right pane with the corresponding data.
Switch to “Product
Details” page to set the information seen by the user for your installation
package. Fill the fields in the right pane with the corresponding data.

The information from this view will be displayed in the Control Panel.
3. Set Theme
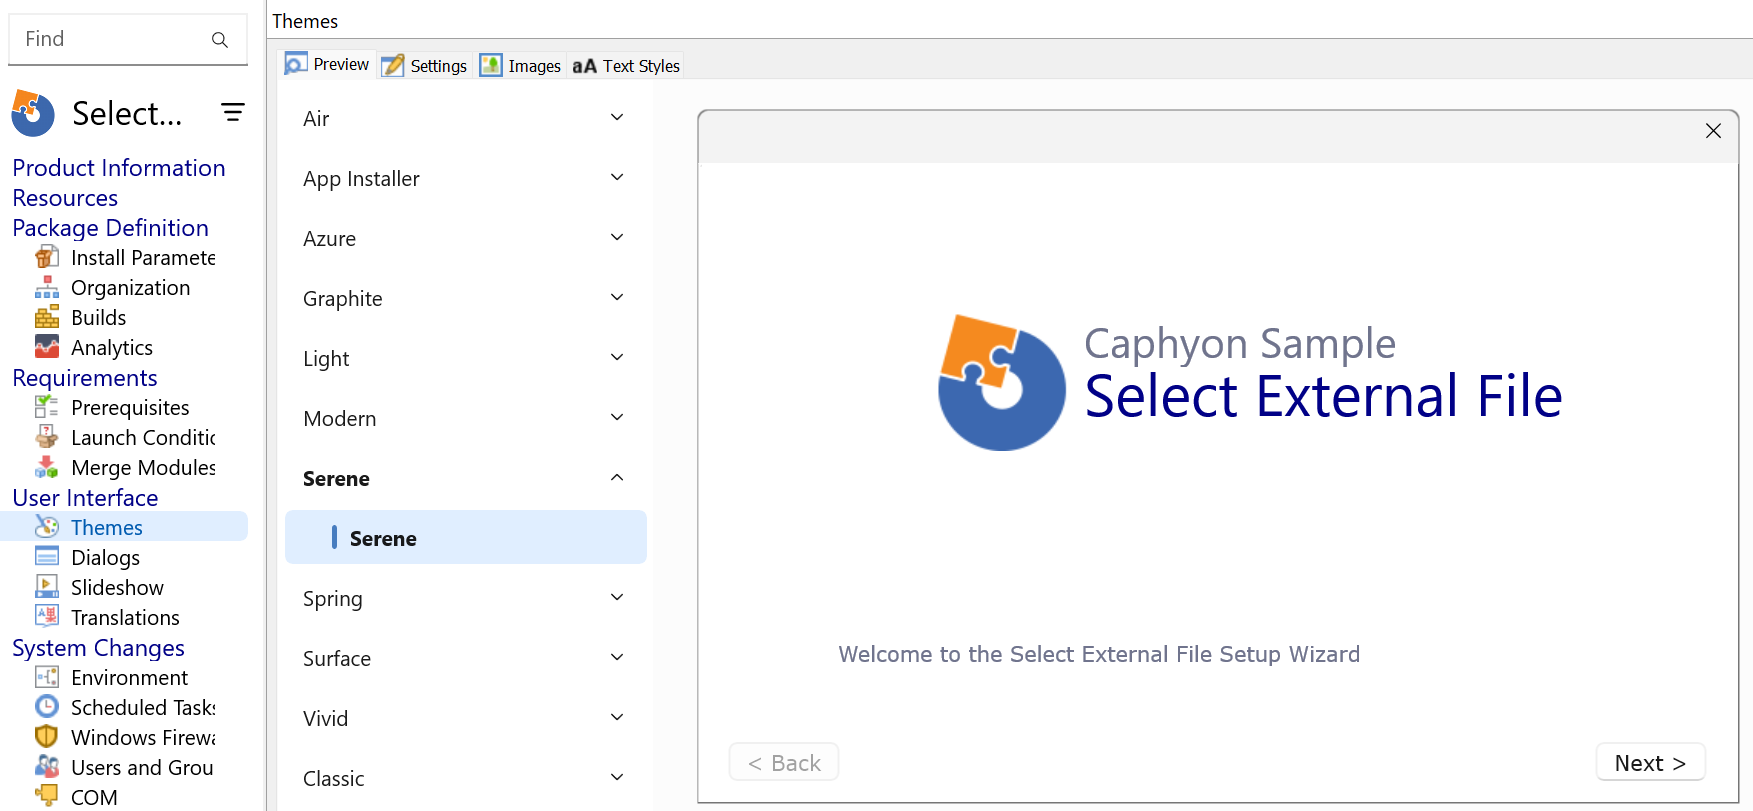
Since we are about to customize the dialogs to allow the user to select the external file, we need to select first the Theme for the installer. Advanced Installer comes with a predefined list of themes and variations which you can choose from. In the Themes view feel free to chose the one that is more suitable for your design.
If you change the theme for the installer later, any customizations made to the
dialogs will be lost. The dialogs will revert to the default ones provided by the new
theme.
For the current sample, we will select the Serene theme:

4. Create dialogs to select the external file
In the Dialogs view you can edit and create custom dialogs.
Select the Dialogs view from the left entry. Basically you need to add a new dialog or change an existing dialog to match your design.In the current example, I've added a new dialog and started adding installer controls based on scenario:

Here is a preview of the dialog that allows users to select an external file:

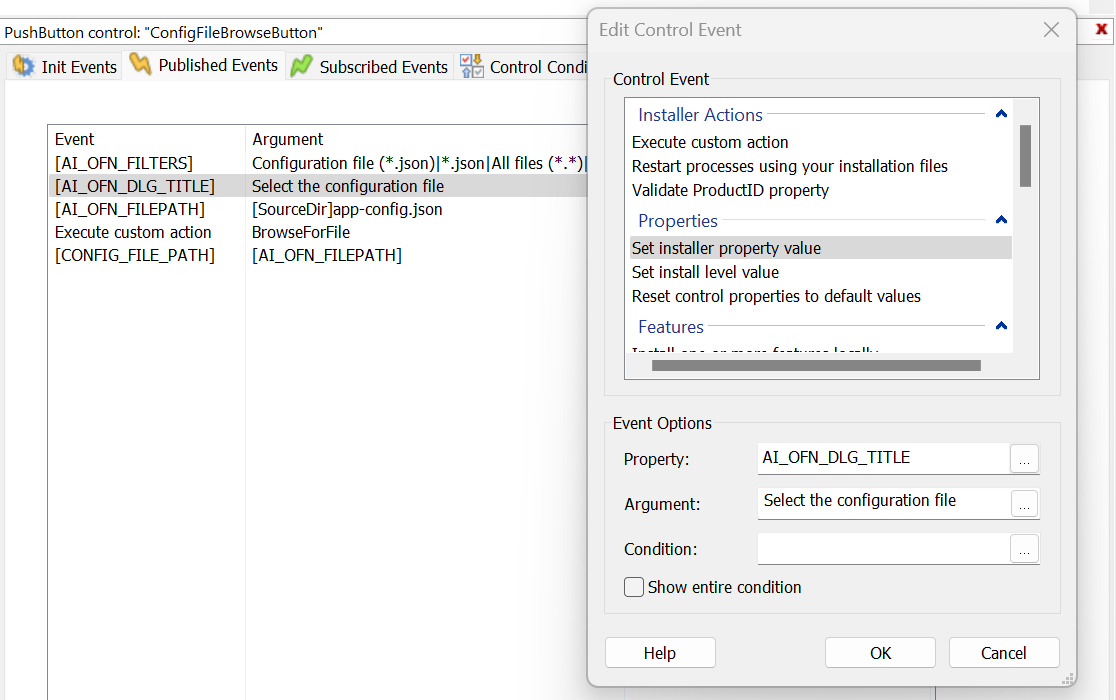
Almost all functionality is defined by the Browse.. push button. The actions executed by this button can be viewed in the Published Event tab.

If you have two projects open in the same version of Advanced Installer, you can easily copy and paste
elements like custom actions between them, simplifying the configuration process
significantly.
Most of the actions that are executed as published events are of Set Installer Property type, which allows setting properties with desired values, in our case, customizing the Open File dialog.

Through these published events, various properties of the Open File dialog are set:
- Filtering files based on their type: AI_OFN_FILTERS
- Set dialog title: AI_OFN_DLG_TITLE
- Set open file dialog with the path of the directory where the MSI is running: AI_OFN_FILEPATH
- Set the field with the path of the configuration file with selected value: CONFIG_FILE_PATH
- The actual BrowseForFile dialog is displayed by the Browse for file added in the Custom Actions view
You need to add first the Browse for file predefined custom action in the Custom Actions view.
5. Configure the Custom Action
We need to configure the custom action that will copy the external file in the installation directory.
Select the Custom Actions view from the left menu and from the list of custom action, add the Launch EXE with working directory as a custom action with sequence.
You can configure the custom actions as below:

Some mentions about the custom action configuration:
- When the system is being modified (deferred): Since we are modifing the system, the custom action should be of deferred type.
- Run under the LocalSystem account with full privileges (no impersonation): Since the default install path in located under the Program Files we need admin permissions to copy files in the install location.
- Fail installation if custom action returns an error: Since the custom action is not critical for the setup, the custom action can be ignored if it fails.
To open the installation folder after the setup completes, you can use the launch file custom action, executed
at the end of the installation. By passing the APPDIR property in the
File to Launch field, you can effectively open the installation directory for
the user.
6. Cleanup installer folder
During an uninstall, Windows Installer removes only the data that is registered in the MSI file. This includes files, registry entries, and other resources that were explicitly included in the installation package. However, any data created by custom actions, the installed application, or the user is not registered in the MSI and, consequently, will not be removed during the uninstallation process.
This means that files generated by the application during its runtime, user-specific settings, and any modifications or additional files created through custom actions remain on the system. To ensure a thorough cleanup, additional custom actions may need to be implemented in the uninstall process to specifically target and remove these residual files and data.
By understanding this behavior, you can better manage the uninstallation process and ensure that your application does not leave behind unnecessary files and settings, maintaining a clean system environment for your users.
To handle this scenario there are several approaches that can be used:
6.1 Configure a file removal
Since we also copy the configuration file through a custom action, to remove the related file on uninstall, we can configure a file removal operation.
To configure the file removal operation, select the Files and Folders view and from the toolbar, add the file removal operation. Configure it as below:

Essentially, we configured the uninstallation process to remove all files with a .json extension.
6.2 Configure a folder removal/uninstall cleanup
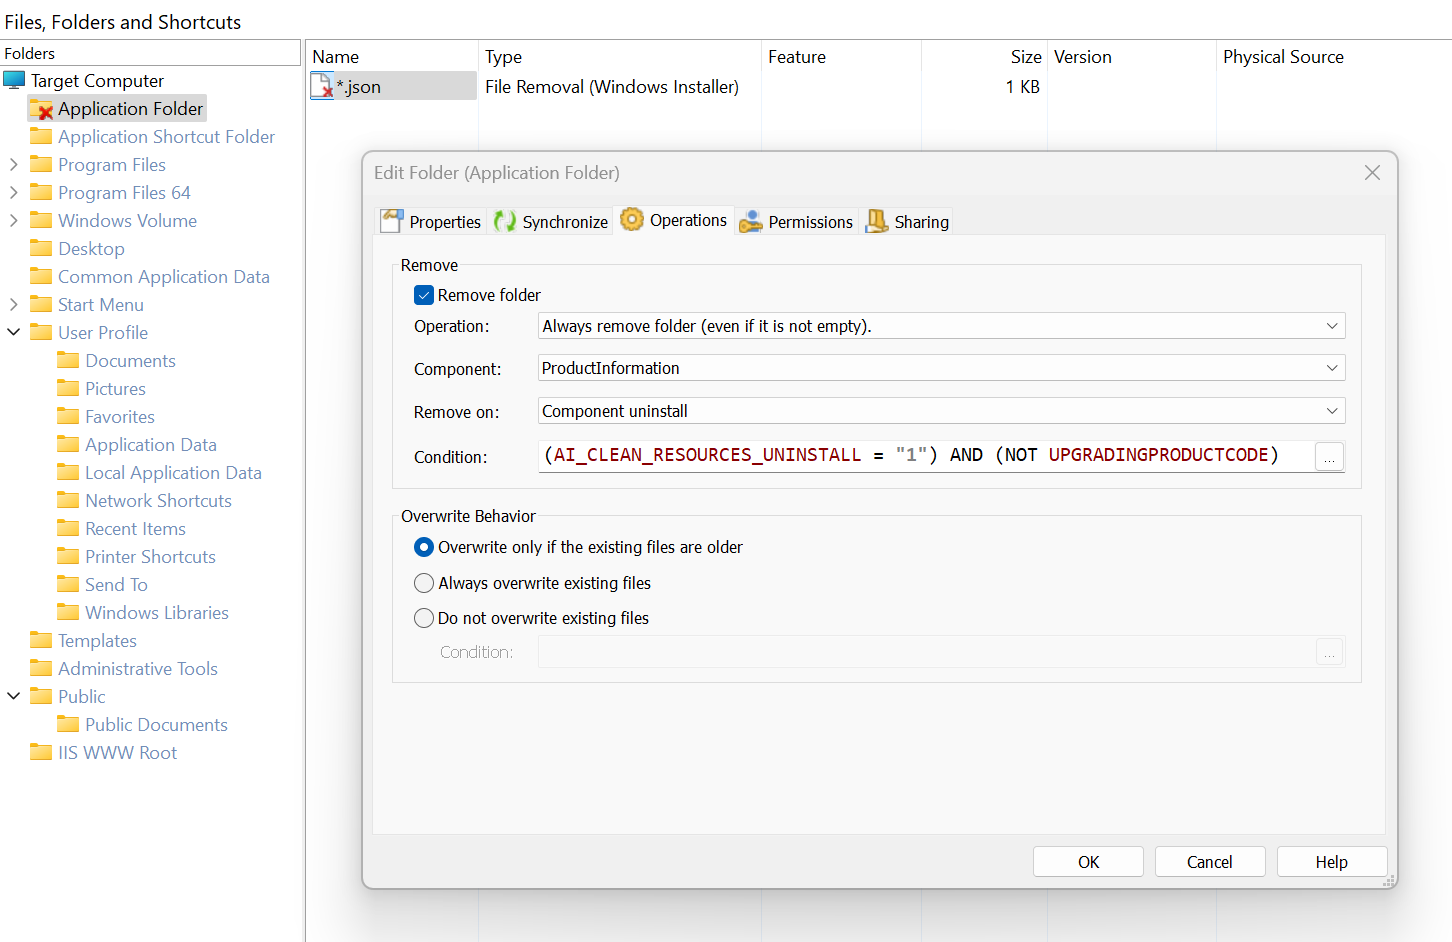
If there are multiple files to be removed, defining a file removal operation for each file type can be difficult. For this, you can take advantage of the Uninstall Cleanup support:

This basically ensures a folder is removed even if it contains files from outside
the installation package. You can differentiate a folder that has the cleanup active by
the![]() mark:
mark:

You can review the Uninstall Cleanup settings in the folder operations tab:
